Ermenrich LT40 Laser Level Review
Specifications
Body
Compensator
Controls
Competition comparison table
Laser line thickness at different distances
Laser line brightness measurement
Adjustment
Package
Pros and cons
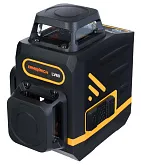
A tough nut to crack with excellent functionality – this is how the Ermenrich LT40 Laser Level can be briefly described.
The device projects two planes: vertical and horizontal with a beam sweep of more than 130°.
It has 10 levels of brightness adjustment, and it works with a receiver and in tilt mode (TILT function). Let’s take a closer look.
Specifications
Accuracy: ± 1.5mm/5m (or ± 0.3mm/m)
Working distance: 30m (depending on lighting level)
Compensator range: 4°±1°
Dust and moisture resistance grade: IP54
Compensator installation speed: 2 sec.
Works with a receiver: yes
TILT function: yes
Mounting thread: 1/4"
Laser class and wavelength: II, 505–550nm
Beam sweep: > 130°
Brightness levels and operating time: 1 – 10h, 10 – 40h (10 levels in total)
Power supply: 4xAA batteries
Operating temperature: -10°C to +50°C
Dimensions: 90 x 57 x 81mm
Minimum distance from the horizon:
5.5cm to the floor
2.7cm to the ceiling
2.8cm from the vertical plane to the wall
Body
The Ermenrich LT40 Laser Level has a well-built body made of good ABS plastic, which in turn is completely covered with a black thick rubber jacket.
The front aperture is made at an angle, which is helpful when working in confined spaces. Therefore, when installing the device to a wall, the line passes along three planes: along the floor, the wall, and the ceiling. It slightly touches the wall behind the laser level.
It’s definitely more convenient than a non-tilted aperture.
The battery compartment, which is located at the base of the case, has a non-removable cover, which is a plus. There is also a neatly mounted 1/4-inch thread for mounting on a tripod and other additional accessories.
If you look closely, you can see that the lid is closed using a tongue-and-groove system, which improves the protection from dust and moisture.
Disassembling the case is very simple: Unscrew the 4 screws from the bottom and you immediately get access to everything inside, while the device is fully operational. The only thing is that the top cover remains on the cable; on the Huepar BOX-1G laser level, for example, the cover can be completely removed.
Inside the Ermenrich LT40 are two laser modules with factory markings. You can often see in conventional laser crosses one laser module for two planes, both vertical and horizontal, like in the Firecore F113XG. That is a direct design cost reduction. As a result, at such levels it is impossible to switch planes individually, plus the brightness of the lines suffers a little.
With the LT40 model, you can choose any desired plane instantly, which must undoubtedly be considered as an advantage.
Compensator
The Ermenrich LT40 Laser Level has a standard mechanical compensator with a fairly high installation speed of only 2 seconds.
The working range of the compensator is 4°±1°. If this inclination is exceeded, a visual alert will immediately be activated – the lines will begin to flash rapidly. To eliminate the blinking, it is necessary to reduce the tilt of the device to acceptable values.
The entire compensator structure is mounted on four plastic supports. But to be fair, all of the supports have several additional stiffening ribs, and so the entire structure can be considered as very rugged.
Controls
Apart from some small nuances, the controls of the Ermenrich LT40 level are very simple and intuitive.
There is a toggle switch in front that either blocks the compensator for transportation or opens the pendulum and turns on the device.
By the way, the toggle switch itself seems tight and not very comfortable. Although it should be noted that the compensator gets locked tightly without any gaps.
Everything else is controlled using the membrane keyboard on top.
The green (+) and yellow (-) buttons increase or decrease the brightness of the laser lines in 10 increments.
The red power button is responsible for several functions:
- Turns on the device in a locked state (TILT function) for marking at an angle. With the device turned off, hold the button for 3 seconds.
- A short press switches the planes individually in all modes.
- In auto-leveling mode, hold the button for 2 seconds. The operating mode with the receiver (pulsating mode) is activated.
The LED on top has the following warning signals:
- When the TILT function is turned on, it stays red.
- In auto-leveling mode on level ground, it is stays green.
- When the horizon is too high (the tilt angle is too large in auto-leveling mode), it lights up red.
- When the receiver operating mode is activated, it rapidly blinks in green.
- It flashes in red when the batteries are low.
Competition comparison table
| Specifications | Ermenrich LT40 | Huepar BOX-1G |
| Accuracy, mm/m | ± 0.3mm/1m | ± 0.2mm/1m |
| Compensator range, ° | 4°±1° | 4°±1° |
| Range without/with receiver | 30*/50m | 45 (100LUX)*/60m |
| Operating time (brightness level) | 1 lvl – 10h, 10 lvl – 40h | ~ 4.5h |
| Control panel | analog | analog |
| Dust and moisture resistance | IP54 | IP54 |
| TILT function | + | + |
| Works with a receiver | + | + |
| Remote control | − | − |
| AC power supply | − | − |
| Battery | 4xAA | 4xAA |
| Operational temperatures | −10°С to +50°С | −10°С to +50°С |
| Brightness adjustment | 10 levels | − |
| Bluetooth | − | − |
Laser line thickness at different distances
Laser modules at this level produce a good, fairly thin laser line. It should be noted that, in the dimmest mode, the 10th, the lines will be the thinnest; there will be a direct correlation between thickness and brightness.
Therefore, we will take measurements in the 1st, brightest mode, and the line thickness test at different distances at the Ermenrich LT40 Laser Level showed the following results:
- 1.5mm at 1 meter
- 1.5mm at 5 meters
- 2.5mm at 10 meters
Laser line brightness measurement
Typically, the brightness test is done on laser levels with cone prisms, as they have a certain inhomogeneity of the glow around the perimeter. However, for the sake of experiment, let’s measure the maximum brightness of this two-plane laser level with a lux meter.
- 33.3 lux at 5 meters
- 15.9 lux at 10 meters
Adjustment
If there is a need to adjust the accuracy, with this model it is quite easy to do it yourself.
The easiest way to adjust the position of the pendulum is if you find a coaxial (identical) displacement of both planes. Or the horizontal plane faces up or down, but the vertical is normal.
In the second case, it is enough to simply use two longitudinal adjustment bolts in the pendulum: If the plane faces downwards, we tighten the bolts, and loosen them if it faces upwards.
If the general tilt is toward both planes, then tighten or loosen (depending on the inclination of the planes) the transverse adjustment bolt.
Adjustment of the position of the laser module is made with 3 small hexagon bolts: The upper and lower ones tuck the module in, and the middle one fixes it in place. Loosen and tighten these bolts a little at a time.
Similar levels with such laser modules have a third setting. Sometimes the line goes in an arc up or down. These lines are fixed with four bolts at the end of the module.
The kit includes:
The Ermenrich LT40 Laser Level comes in a colorful branded box.
The kit includes: the level itself, a soft case with a belt clip, a wall magnetic mount, and a brief manual in different languages.
Pros and cons
Pros: 10-step line brightness adjustment, high-quality build and materials, thin green lines, operating mode with the receiver, TILT function, separate switching of planes, easy disassembly and calibration, good beam sweep, and a magnetic mount included.
Cons: no AC power supply, tight tumbler.
Any reproduction of the material for public publication in any information medium and in any format is prohibited. You can refer to this article with active link to levenhuk.com.
The manufacturer reserves the right to make changes to the pricing, product range and specifications or discontinue products without prior notice.


